You might have stacks of DVD collections laying around the house, and want to convert DVD to F4V file on hard drive so that you can then bring a movie library onboard, or take it along to saving luggage space while traveling or upload to online website like Youtube, Vimeo for sharing or enjoy then with players like Plex. F4V is a common format which generally is supported by almost all playback devices or media player software. If you want to watch a DVD movie on your F4V or other portable devices, you can rip or convert the DVD into F4V format. So how can you convert DVD to F4V?
Use UFUShare DVD Ripper for Windows or Mac, which is an easy-to-use yet multifaceted tool for ripping DVDs as well as editing individual scenes, cropping the video to adding in effects. Regardless of commercial or home-made DVDs, you can handle the ripping task without a hitch using this software. Not only rip your media DVD to F4V format to enjoy them on your computer or media center, but also a great way to create backups without damaging discs.
Besides capable of converting DVD to an F4V format on Windows 10 or Mac OS X (macOS 10.14 Mojave included), it also supports the conversion from DVD collection to a wide range of other popular video formats.
 Download DVD Ripper for Windows:
 Download DVD Ripper for Mac:
How to Rip and Convert DVD to F4V on Windows 10/8.1/8/7/Vista/XP?
Rip and Convert DVD to F4V on Windows 10: Step 1 > Run UFUShare DVD Converter Ultimate, install and launch the program.
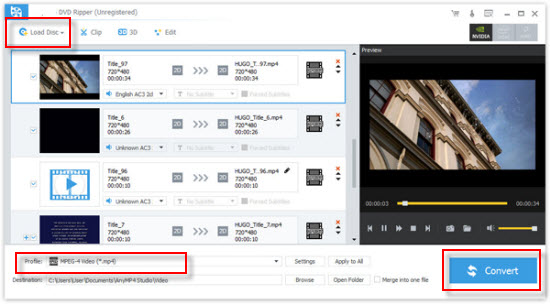
Rip and Convert DVD to F4V on Windows 10: Step 2 > Insert the DVD into your optical drive, and UFUShare will load the content on the DVD automatically. You can also load the source manually by clicking the “Add File(s)” button. But if the source is a file/folder, you can click “Add File(s)” drop-down button, “select Other Folder…” option or “Open IFO Files…” option to load it.
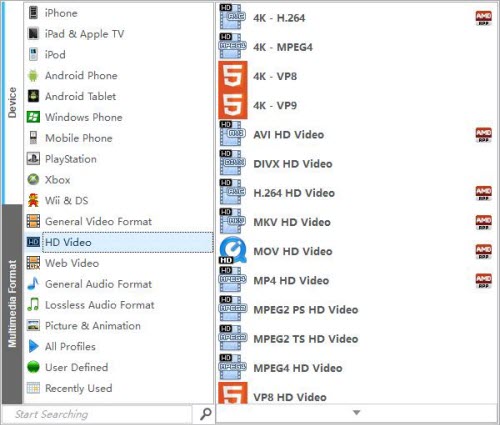
Rip and Convert DVD to F4V on Windows 10: Step 3 > Navigate to the profile library and choose F4V format.
Rip and Convert DVD to F4V on Windows 10: Step 4 > Now you can choose the titles, chapters, audios and subtitles, define the names of the titles, and do advanced settings according to your needs. You even can edit the DVD video with the built-in editor.
Rip and Convert DVD to F4V on Windows 10: Step 5 > Click the “folder” button to select a directory to save the output video. And then you can click the “Start” button to start the ripping process.
Steps to Rip and Convert DVD to F4V on Mac OS X (macOS 10.14 Mojave included)?
Step 1: Install and run the Mac DVD to F4V Ripping software
After installation, run the UFUShare DVD Ripper for Mac software. You can see the main interface as below.
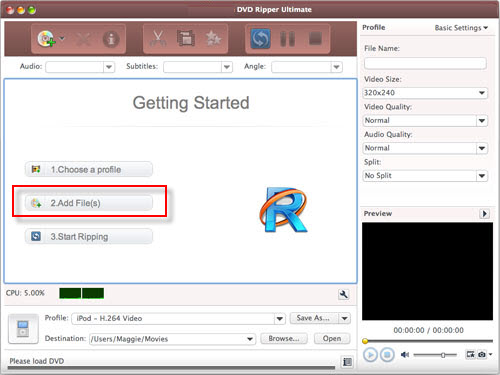
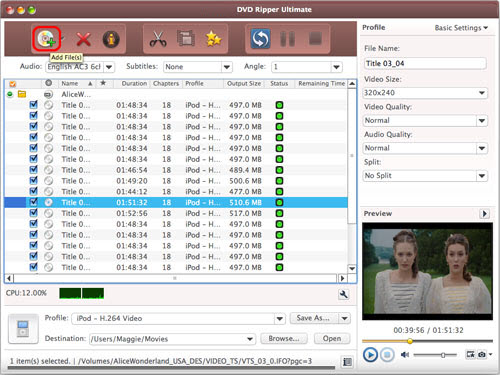
Step 2: Click “Add File(s)” button on the toolbar or select “File > Add File(s)” on the main menu to load DVD.
Or, click “Add File(s)” drop-down button, “select Other Folder…” option, select a DVD folder in the file dialog box that opens, and load it.
Click “Add File(s)” drop-down button, select “Open IFO Files…” option, select an IFO file in the file dialog box that opens, and load it.
Step 3: Select output format
Select the files need to be converted and click “Profile” button to select the output format F4V in the drop-down list. Then click “Browse…” button to specify destination folder for saving output files.
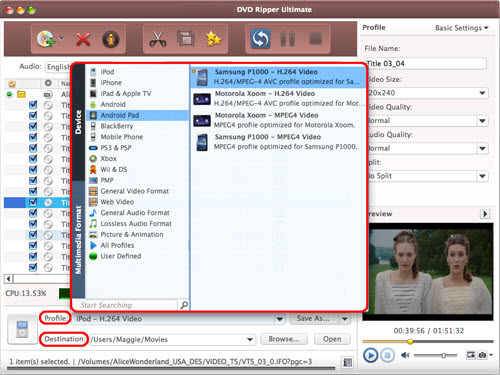
Step 4: Convert DVD to F4V on Mac OS X
After selected output profile, you only need to check the files you want to convert in the file list and click “Rip Checked Item(s)” button on the toolbar to complete DVD to F4V conversion on Mac.


