“How do you import video from a DVD into Final Cut Pro X? I have an hour nd 25 minute DVD final project that I thought I had backed up on the hard drive. My mistake. The question is how do a import the video project from the DVD back into Final Cut Pro X?”
“I have a wonderful DVD borrowed from my roommate, and I wish to import this DVD to my Final Cut Pro for editing on it and using some of the video in another project. However, each time I’ve tried to put DVD to my FCP I received an error code. Any suggestion? By the way, I want the picture quality to be as best as possible. Thanks in advance.”
Final Cut Pro (FCP X included) is the first selection for users to edit videos on Mac OS. Final Cut Pro can accept importing various video sources from cameras, drives, network locations, and camera archives. But not DVD videos. Fortunately, there is an easy way to fix this problem. To transfer video from DVD to Final Cut Pro X or FCP 7/6, you’ll need to convert DVD to Final Cut Pro compatible video format first.
Solution to Solve DVD Can’t Import to Final Cut Pro X/7/6
In fact, Final Cut Pro (FCP 6/7/X included) cannot access any of these Video_TS files from a DVD, but the files that it can read and do import into FCP are VT_01_1.VOB and VTS_01_2.VOB….The VOB file from a DVD contains no sound, it only plays portions of imported material. Well, is there an easy way for importing DVD footage into Final Cut Pro successfully for further editing? In fact, ripping media off a DVD to insert in your video project does not have to be a tricky process. To get the work done, you just need to convert DVD to Final Cut Pro friendly formats along with some help from third-party softwares. I mean you can achieve your goal smoothly with a professional Mac DVD to Apple ProRes Converter.
To convert DVD movies to FCP on Mac (including os Sierra or EI Capitan), UFUShare Recommended DVD Ripper for Mac will be a great help. It is easy to use for editing and conversion and makes great quality copies of DVDs. With it, you can effortlessly rip DVD to Apple ProRes 422/4444 MOV format for further editing within your Final Cut Pro 6/7 and FCP X. Besides, you are allowed to edit the DVD movies by trimming, cropping, adjusting video effects, etc. to get the very wanted part and effects as you like. Moreover, this DVD converter can also help you convert DVD to all other popular video formats like AVI, MOV, MKV, WMV, FLV, MPG, etc. for playing and sharing on iPhone, iPad, Samsung Galaxy, HTC, LG, Sony Xperia, Archos, Zen, Blackberry, Google Nexus, Kindle Fire, Nook HD, YouTube, Facebook, etc. bypassing the DVD copy protection. Just get it and follow the steps to complete your task.
Download DVD to FCP Converter for Mac

 >>Buy DVD to FCP Converter for Mac
Steps to Rip/Convert DVD movies to MOV for Final Cut Pro X/7/6 on Mac with Ease
Step 1: Load DVD movies
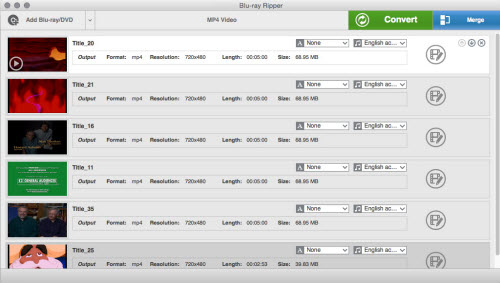
Insert the DVD disc you want to convert. Click “Load DVD” to import the DVD movies. Or simply drag the DVD disc icon on the desktop to the DVD to FCP Converter for Mac program. Loaded DVD movies can be previewed in the right preview window.

Step 2: Select output format
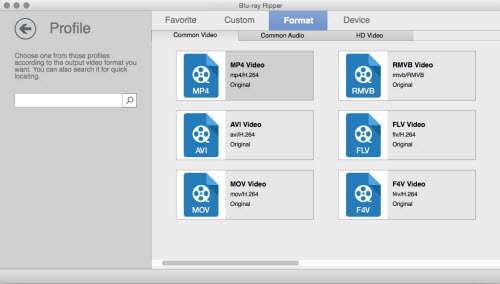
Clicking “Format” bar and choose Apple ProRes 422 (*.mov) as output format from the “Final Cut Pro” category.
Tip: To have a smooth playback and editing after conversion, for FCP 6, you can only choose ProRes 422 and ProRes 422(HQ) as export format; while, for FCP 7 and FCP X, ProRes 422(LT)/ProRes 444/ProRes 422(Proxy) are all supported. In addition, video presets for 150+ devices like iPhone, iPad, iPod, Samsung Galaxy, HTC, LG, Sony Xperia, PSP, Xbox 360, Zune, Archos, etc. are provided to help you get videos to best fit a certain device.

Step 3: Start DVD to FCP ProRes MOV conversion and then add videos to Final Cut Pro X/7/6
When all the settings are fine, click the Convert button to start converting your DVD movies to optimized Apple ProRes 422 MOV video files for Final Cut Pro X/7/6. When then conversion completes, the destination folder will open automatically. Get the ripped video files and launch FCP X/7/6 to add the videos for editing:
1. Open File and click New Project.
2. Select your scratch disk.
3. Enable the Project Viewer Window
4. Browse to the right folder or file bin where your video files will be stored.
5. Click or drop on the fide files that you want to edit.
6. Drag the movie files or clips into the timeline sequence.
Once the files are properly uploaded, you can edit it as necessary. Final Cut Pro X/7/6 is a great software to use to manipulate video files and clips to exactly how you wanted them to be. And now just enjoy your home movie making

