“I’ve got a ton of Canon XF200 footage that I’m trying to upload the Canon XF200 MXF files to YouTube for sharing. Since the files come out natively as MXF, YouTube couldn’t recognize these MXF video files at all, let alone do the uploading. What should I do?”
Canon XF200 is a popular professional camcorder which released not long ago, you may have bought this camcorder for professional use, it can help us record vivid high-definition videos. Canon XF200 recorded video files are in MXF format. MXF file is often used in Sony, Panasonic and Canon high-end cameras and camcorders, it is good to record videos, but MXF files are not easy to use because many video sharing websites, editing software and devices can’t read MXF format videos.
YouTube supported video formats are listed below:
MP4 (a multimedia container format standard specified as a part of MPEG-4)
FLV (Flash Video, a kind of video format )
AVI (Audio Video Interleaved, a kind of video format)
MOV (the QuickTime multimedia file format)
3GP (a multimedia container format defined by the Third Generation Partnership Project for 3G UMTS multimedia services.)
MKV (an free container format that holds an unlimited number of video, audio, picture, or subtitle tracks in one file)
MPEG (the Moving Picture Experts Group, a kind of video format)
WMV (Windows Media Video)
SWF (Shockwave Flash)
You might need a video converter first to convert MXF to workable formats to YouTube/Vimeo. Here I’d like to recommend an excellent piece of MXF converter- UFUShare Video Converter for Windows or Mac. The program is specifically designed which excels on output quality and its conversion speed.
How to upload Canon XF200 MXF to YouTube/Vimeo for sharing?
Step 1. As soon as you download and install the program, launch it and when the main interface pops up in front of us, just click the “Add Video” or “Add from Folder” to let in.

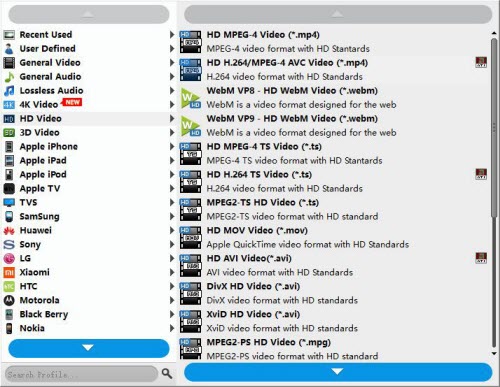
Step 2. Click the drop-down list in the format line to get the format box. Then choose “HD Video>>H.264 HD Video (*.mp4)” or FLV as output format.

Step 3. Click “Settings” button to customize the output video and audio settings by yourself. But if you are not good at it, you’d better use the default parameters, they will ensure you a good balance between file size and image quality basically. You can change the resolution, bit rate, frame rate as you need.
Step 4. After that, click “Convert” to start the Canon XF200 MXF to H.264 MP4 or FLV conversion for uploading smoothly to YouTube/Vimeo.
Conclusion: After conversion, you can get the generated files by clicking “Open Folder” button. Now, you’ll get no troubles in uploading Canon XF200 MXF to YouTube/Vimeo.

